This is a short guide (and reminder for myself) how to add a Samba share as target for macOS Time Machine. I found some blog posts about how to do this, but most of the time the author created a new disk on the share 1 2. This seems like a rather unusual complicated setup to do backups and there are products like the Apple Time Capsule, that works via network discovery. I actually found a blog post (which I can't anymore), how to set up Avahi to announce a share as Time Capsule.
This actually works with every Linux host with samba and avahi installed, but the title with Raspberry Pi in it is much more catchy. And I actually use a Raspberry Pi 4 to provide backup space for my machines and servers.
Setup Samba
To get SMB up and running you have to:
- Install samba via the package manager of your distribution.
- Create a Unix user.
- Create a samba user with
smbpasswd -a. - Create a new folder on your backup volume (in my case this is an external 8 TB Disk on a Raspberry Pi).
- Add the following entry in the
smb.conf. You should adjust thepathanduserto match your environment.
# /etc/samba/smb.conf

[backups]
    comment = Time Machine Backups
    path = /mnt/backups/andre/time-machine
    guest ok = no
    read only = no
    browseable = yes
    valid users = andre
    write list = andre
    vfs objects = catia fruit streams_xattr
fruit:time machine = yes- Restart
smbd.
You should now be able to access the share. If not, check that the user you created earlier actually has the rights to access the folder! You can also add quotas to this share, but I have plenty of free space left, so there is really no need to do this right now.
Configure Avahi
This is the part that will announce the backup server and the SMB service as an Apple Time Capsule. Avahi is a system which provides service discovery on a local network via the mDNS/DNS-SD protocol suite.
- Install Avahi via the package manager of your distribution.
- Add the following configuration for SMB.
- Restart
avahi.
# /etc/avahi/services/samba.service

<?xml version="1.0" standalone='no'?><!--*-nxml-*-->
<!DOCTYPE service-group SYSTEM "avahi-service.dtd">
<service-group>
  <name replace-wildcards="yes">%h</name>
  <service>
    <type>_smb._tcp</type>
    <port>445</port>
  </service>
  <service>
    <type>_device-info._tcp</type>
    <port>9</port>
    <txt-record>model=TimeCapsule8,119</txt-record>
  </service>
  <service>
    <type>_adisk._tcp</type>
    <port>9</port>
    <txt-record>dk0=adVN=backups,adVF=0x82</txt-record>
    <txt-record>sys=adVF=0x100</txt-record>
  </service>
</service-group>
I found this configuration a few months ago but couldn't find it while researching for this post to provide the original source.
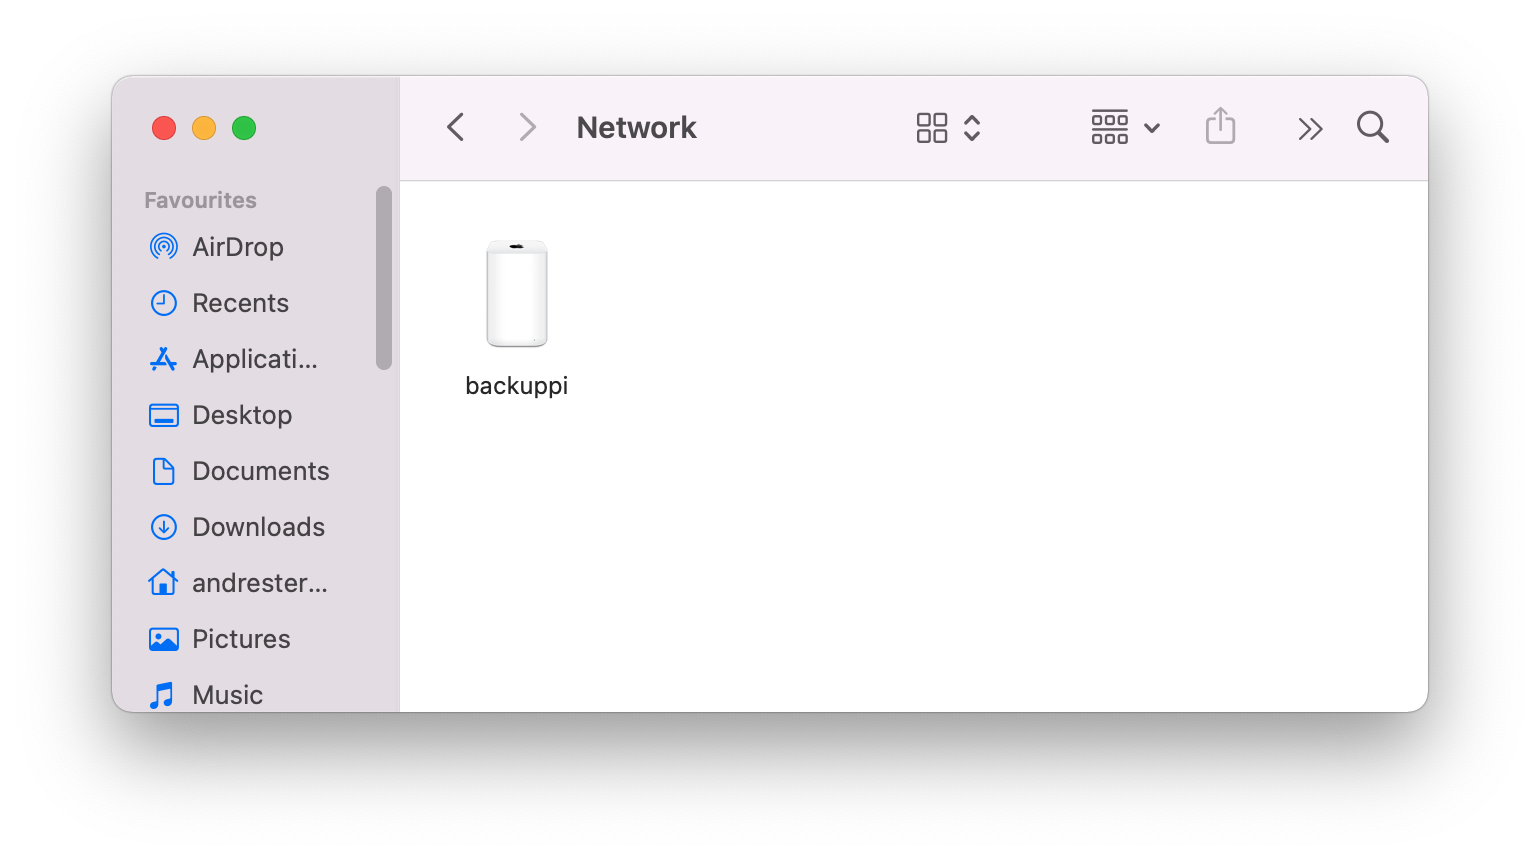
But with this magic piece of XML we have done it! You should now see your Raspberry Pi as an Apple Time Capsule in the network tab of Finder.
Setup Time Machine
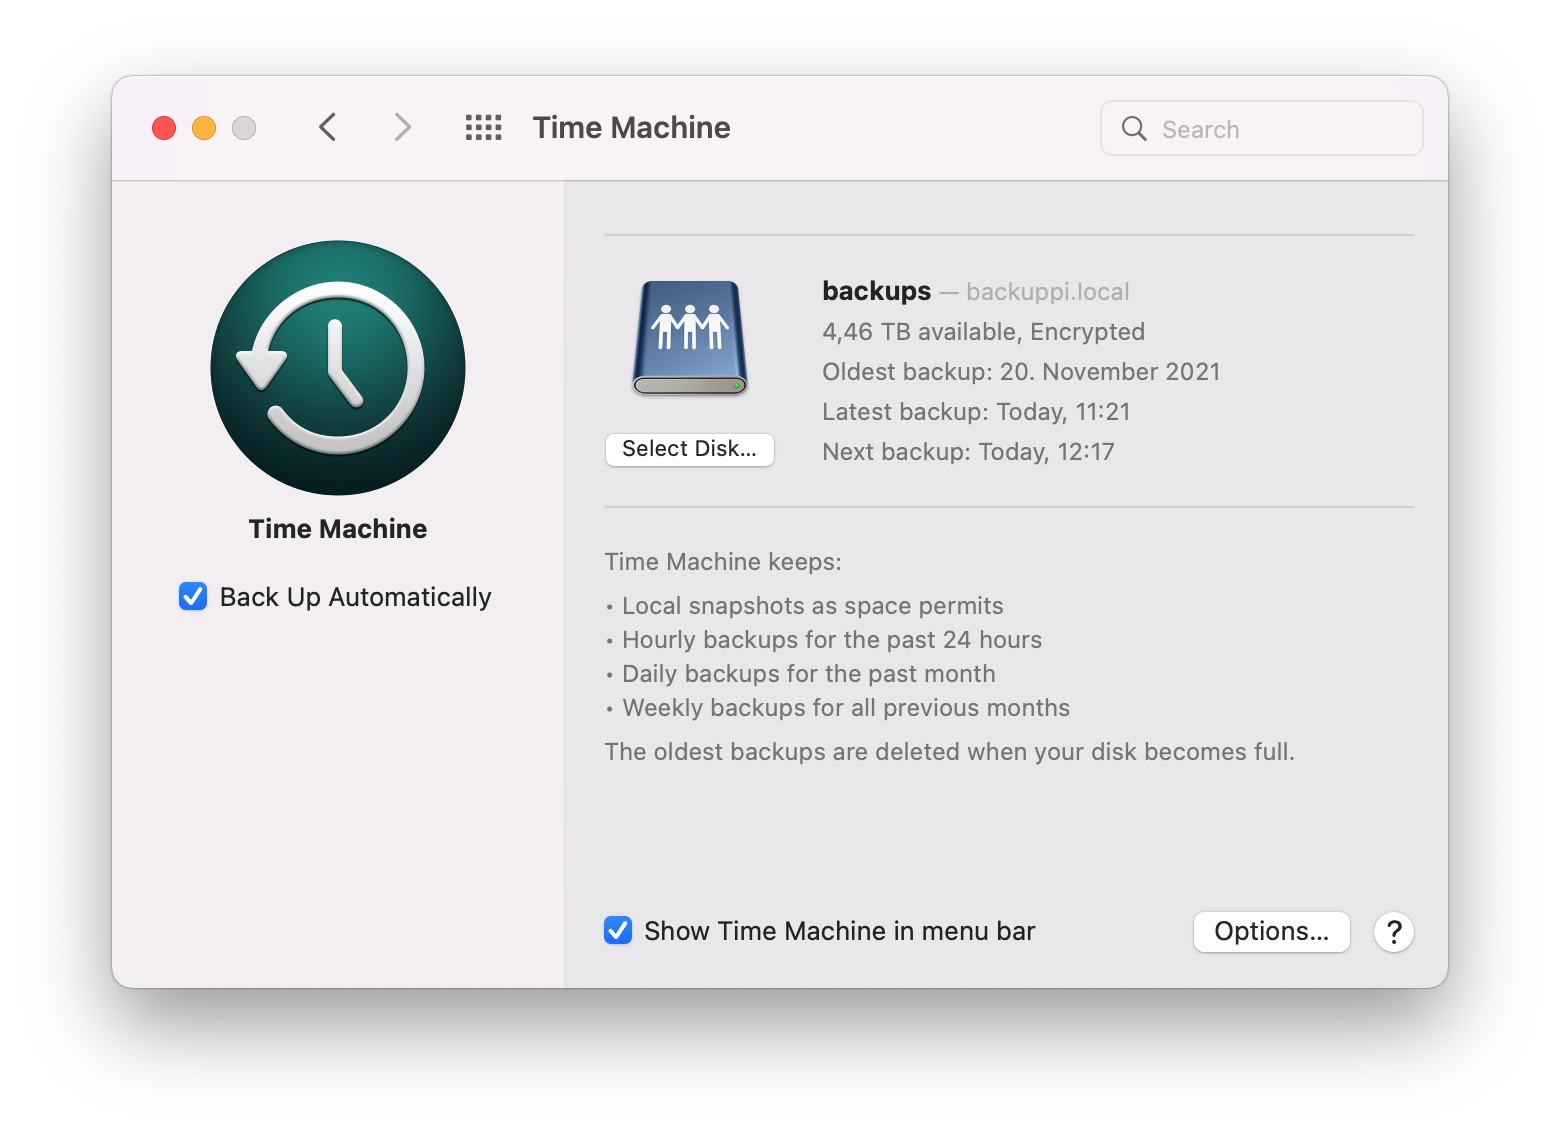
You can now create a new Time Machine backup. Please don't forget to enable encryption, even if the disk you are using on the Pi is already encrypted! While selecting the target disk you should be able to select our newly created backup location.
Conclusion
Well that was more complicated than I think it should be. Why shouldn't Time Machine be able to use a regular SMB share as backup endpoint? Maybe some APFS magic is involved here, and Time Machine does simply send snapshots to the backup location? I have no idea, but I'm pretty happy everything is working now, and I can let backups be as they should be: simple, boring and working.