I was (and still am for some parts) a happy vscode user. On the other hand I was always looking up to all these crazy fast vim/neovim users and their keyboard only drive workflows. After hopping on and off the vim train a few times a year something new came around sometime in 2021 - LSP support on neovim core. LSP stands for Language Server Protocol and defines how your IDE communicates with a specific language server to get features like 'go to definition', 'show references' or 'rename this variable'. This was a huge game changer as you can now use every language server written to work with vscode with neovim. So I took the time to watch a few videos, read the documentation and finally setup neovim and gopls the language server for Go. 1 2 3
In this post I will present the simplest setup to get an IDE-like feeling within neovim.
Overview
Just a quick overview about the neovim ecosystem before we get started.
Neovim supports Lua to configure plugins and a lot of other things. Actually the possibility to configure it via Lua just got a bit better 4.
The old way to configure things is via
init.vim, but personally I prefer an actual programming language instead of vimscript.The last things I want to mention are plugins. There are a lot of plugins, for example we are going to use
nvim-lspconfig, so you should be able to extend your editor more or less like any other editor/IDE.
Install neovim
The configuration I will present needs at least neovim version 0.7 since you can not configure keymaps in lua in version 0.6. As this version is currently only available as a development release you have two ways to install it.
First you can clone the neovim repository and build it yourself, which is actually pretty straight forward and worked well on macOS. Simply follow the instructions in the README.
The second options depend on your OS or Linux distribution. In my case I used the AUR package neovim-nightly-bin.
A basic neovim configuration
Start with a new init.vim in ~/.config/nvim/. At first, we need the LSP plugin itself and some other helpers. I'm using vim-plugged to download and update plugins automatically. Simply install it from the sources of your distribution or follow the instructions provided in the README.
call plug#begin('~/.nvim/plugged')

    Plug 'neovim/nvim-lspconfig'

    Plug 'nvim-lua/plenary.nvim'

    " LSP autocompletion
    Plug 'hrsh7th/nvim-cmp'
    Plug 'hrsh7th/cmp-nvim-lsp'
    Plug 'hrsh7th/cmp-buffer'
    Plug 'hrsh7th/cmp-path'

    " More autocompletion
    Plug 'L3MON4D3/LuaSnip' " There are other snippet engines you could use, but we will be using this one.
    Plug 'saadparwaiz1/cmp_luasnip'

call plug#end()
Now startup neovim and install all plugins with :PlugInstall. We now have a working neovim, but haven't configured anything related to the LSP.
Setup LSP-Plugin
Since we don't want to use vimscript for the complex pieces of the lsp configuration, we will create a lua script for that. The configuration must be stored in ~/.config/nvim/lua/aps.lua. You can of course rename the lua file aps.lua to anything you want, but I used my login name on most of my machines.
Let's start by requiring the new lua configuration file in the previously created init.vim.
lua require("aps")lua require("aps") is the magic keyword to load the lua configuration. This another game changer as I can now configure most things within an actual scripting language, instead of neovim configuration files. So let's have a look at the content of aps.lua.
-- Hook LSP into completion
local capabilities = require('cmp_nvim_lsp').update_capabilities(vim.lsp
  .protocol
  .make_client_capabilities())


-- Setup go language server gopls
require'lspconfig'.gopls.setup {
    capabilities = capabilities,
    completeUnimported = true,
    analyses = {unusedparams = true},
    staticcheck = true,
    on_attach = function()
        -- "n" means normal mode
        -- {buffer=0} means only for this buffer
        -- <cmd> == :
        -- <cr> == enter

        vim.keymap.set("n", "K", vim.lsp.buf.hover, {buffer = 0})
        vim.keymap.set("n", "gd", vim.lsp.buf.definition, {buffer = 0})
        vim.keymap.set("n", "gt", vim.lsp.buf.type_definition, {buffer = 0})
        vim.keymap.set("n", "gi", vim.lsp.buf.implementation, {buffer = 0})
        vim.keymap.set("n", "gR", vim.lsp.buf.references, {buffer = 0})
        vim.keymap.set("n", "gr", vim.lsp.buf.rename, {buffer = 0})
        vim.keymap.set("n", "gf", vim.lsp.buf.formatting, {buffer = 0})
        vim.keymap.set("n", "ga", vim.lsp.buf.code_action, {buffer = 0})
        vim.keymap.set("n", "en", vim.diagnostic.goto_next, {buffer = 0})
        vim.keymap.set("n", "ep", vim.diagnostic.goto_prev, {buffer = 0})
    end
}

-- LSP autocomplete
vim.opt.completeopt = {"menu", "menuone", "noselect"} -- setting vim values

-- Setup nvim-cmp
local cmp = require 'cmp'

cmp.setup({
    snippet = {
        expand = function(args)
            require('luasnip').lsp_expand(args.body) -- For `luasnip` users.
        end
    },
    mapping = {
        ['<C-b>'] = cmp.mapping(cmp.mapping.scroll_docs(-4), {'i', 'c'}),
        ['<C-f>'] = cmp.mapping(cmp.mapping.scroll_docs(4), {'i', 'c'}),
        ['<C-Space>'] = cmp.mapping(cmp.mapping.complete(), {'i', 'c'}),
        ['<C-y>'] = cmp.config.disable, -- Specify `cmp.config.disable` if you want to remove the default `<C-y>` mapping.
        ['<C-e>'] = cmp.mapping({
            i = cmp.mapping.abort(),
            c = cmp.mapping.close()
        }),
        -- Accept currently selected item. Set `select` to `false` to only confirm explicitly selected items.
        ['<CR>'] = cmp.mapping.confirm({select = true})
    },
    sources = cmp.config.sources({
        {name = 'nvim_lsp'},
		{name = 'luasnip'} -- For luasnip users.
    }, {{name = 'buffer'}})
})

-- Enable inline errors
vim.lsp.handlers["textDocument/publishDiagnostics"] =
    vim.lsp.with(vim.lsp.diagnostic.on_publish_diagnostics,
      {update_in_insert = true})
This configuration is more or less based on the excellent video by bashbunni and TJ 1.
The exciting part begins with require'lspconfig'.gopls.setup, as this is the place to configure the LSP to your favorite hotkeys. The bindings are set up within the attribute on_attach of the gopls object. I try to keep them in sync with my wording e.g. go to type definition uses the hotkey gt or go to definition uses gd.
I especially like the binding gf (or go fmt) to get my Go code formatted. But you configure these to whatever you want. In my case all of these work only in "normal" mode and without usage of the leader key.
Most of the other parts are related to autocompletion provided by nvim-cmp and lua-snip, which are covered in these videos by TJ 5 6. I'm still a very basic user of these and especially lua-snip is a magic tool, which I want to explore deeper in the near future. But let's keep it simple for now and simply accept that we need this to get an IDE-like autocompletion.
At this point you should be able to open a go file and get basic highlighting and completion.
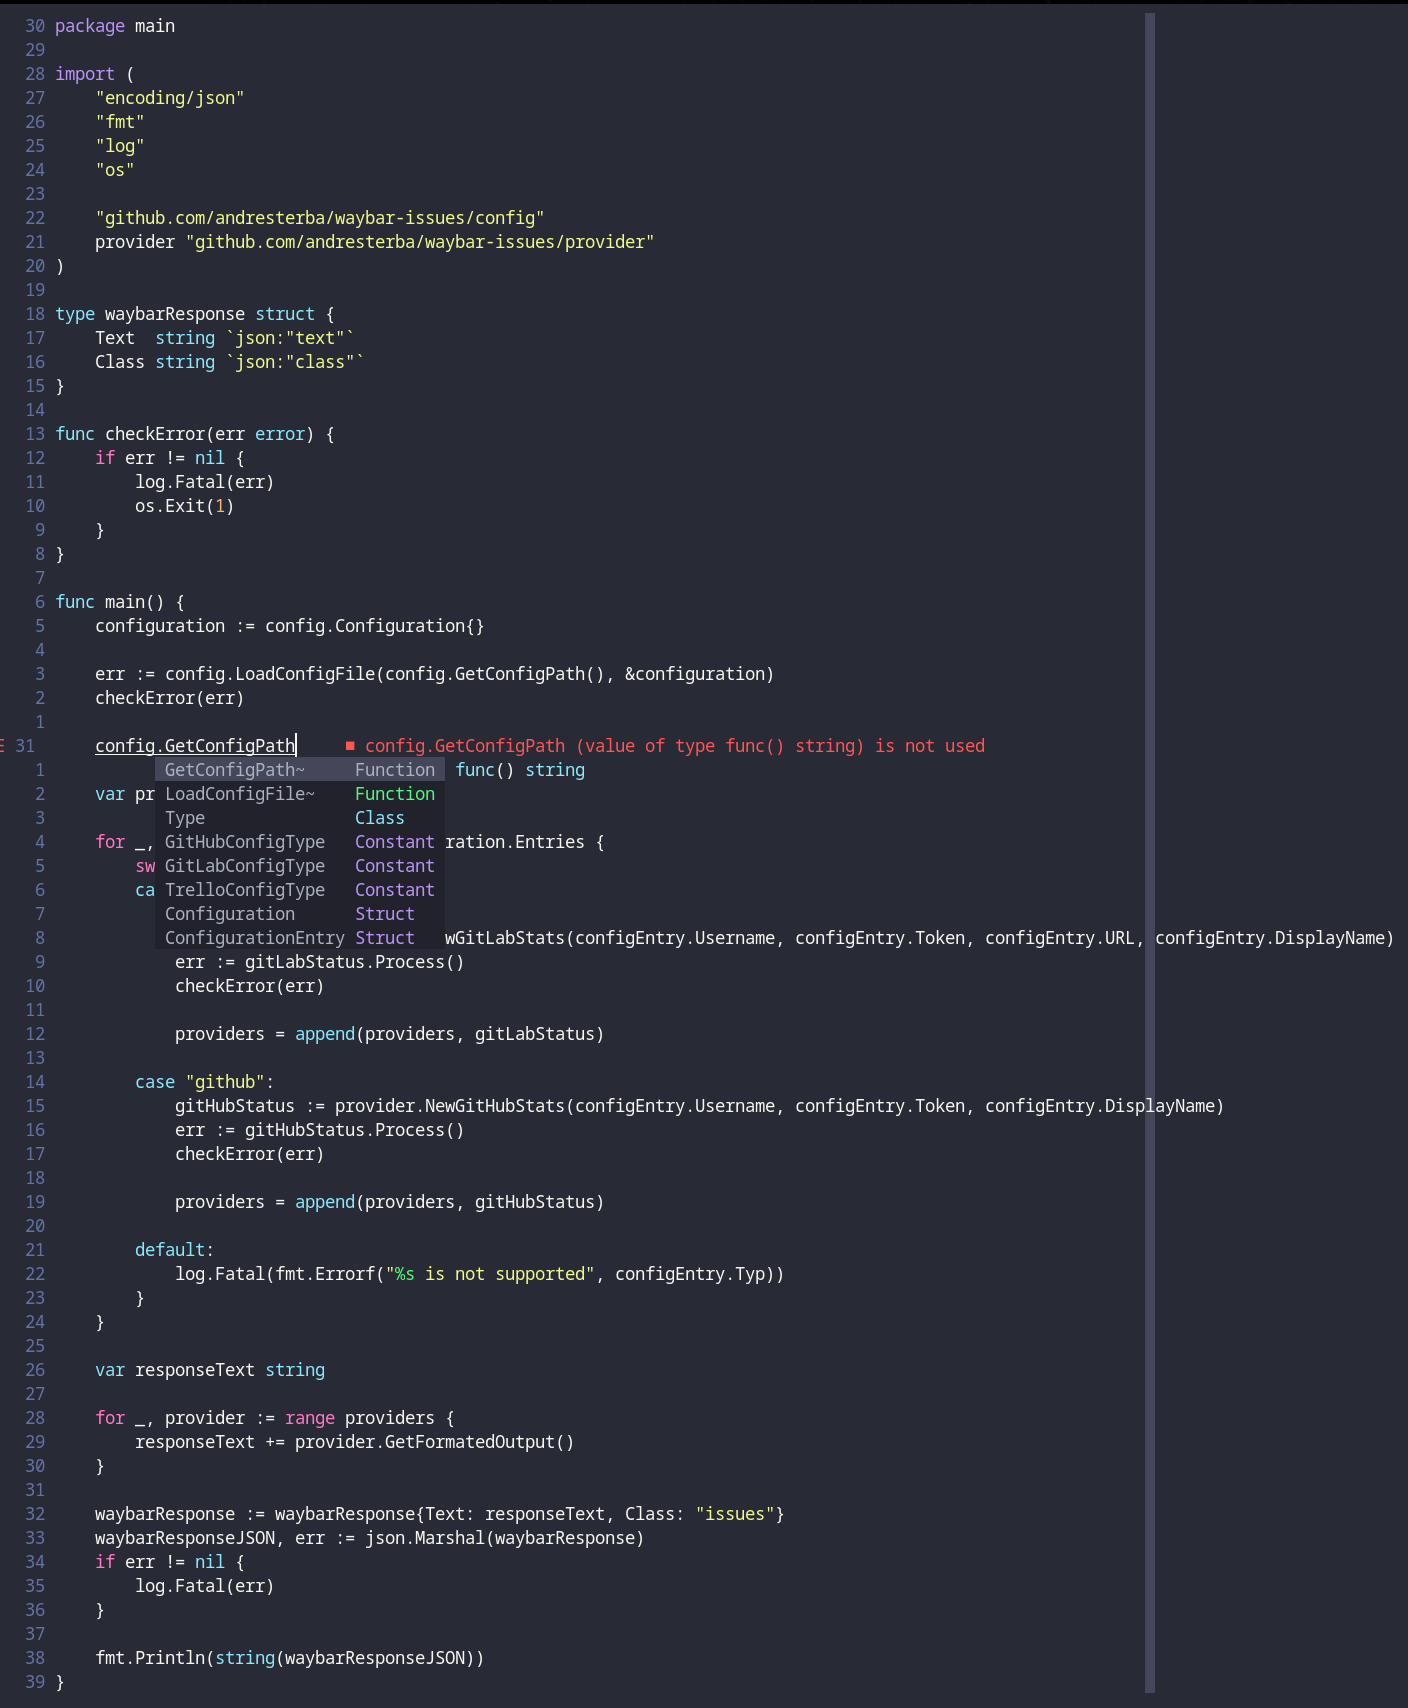
As you can see the completion provided by the LSP works fine, but the highlighting is not as good as I would like it. We will explore how to get there in the next section of this post.
Treesitter for better highlighting
Treesitter will build a syntax tree for your current file and add highlighting based on this syntax tree. This is a pretty huge dependency, and you can skip this if you are ok with the look of your code in the earlier provided image.
I can also recommend this video (again) TJ about LSP vs treesitter 7.
To enable treesitter we have to add the treesitter plugin and provide a basic configuration in our lua configuration.
Add this to the plugin section if your init.vim.
Plug 'nvim-treesitter/nvim-treesitter', {'do': ':TSUpdate'}Again open neovim and run :PlugInstall to get the plugin. The initial run of TSUpdate will take a long time (long in 30 seconds to 1 minute) to install all the treesitter plugin for the most common languages.
Now add the following at the bottom of your lua configuration. This is basically the simplest configuration provided in the treesitter README 8.
require'nvim-treesitter.configs'.setup {
  -- One of "all", "maintained" (parsers with maintainers), or a list of languages
  ensure_installed = "maintained",

  -- Install languages synchronously (only applied to `ensure_installed`)
  sync_install = false,

  -- List of parsers to ignore installing
  ignore_install = { "javascript" },

  highlight = {
    -- `false` will disable the whole extension
    enable = true,

    -- list of language that will be disabled
    disable = { "c", "rust" },

    -- Setting this to true will run `:h syntax` and tree-sitter at the same time.
    -- Set this to `true` if you depend on 'syntax' being enabled (like for indentation).
    -- Using this option may slow down your editor, and you may see some duplicate highlights.
    -- Instead of true it can also be a list of languages
    additional_vim_regex_highlighting = false,
  },
}
And that's it! Let's open up the file from before again and have a look at the differences.
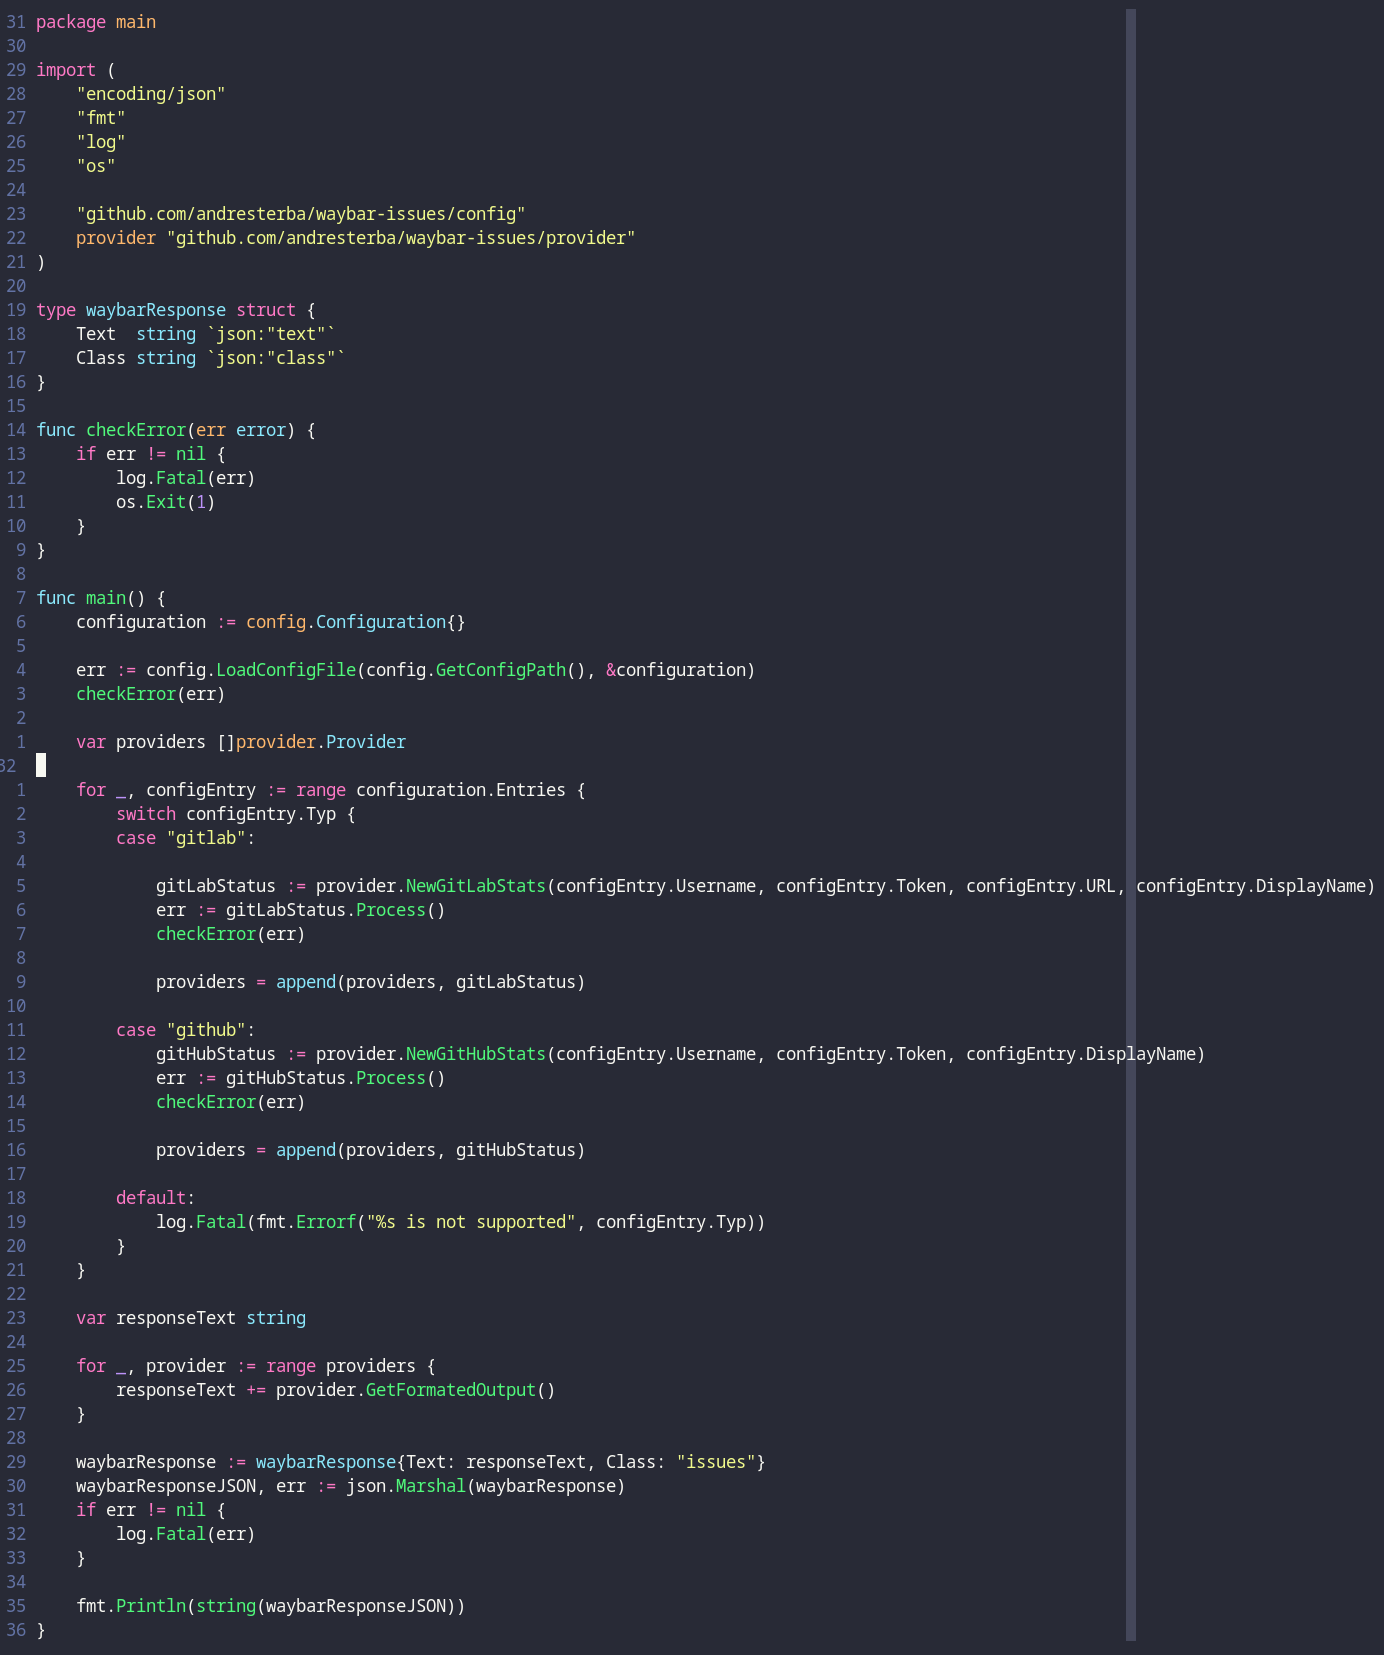
As you can see for example functions are now highlighted! In case you wonder, I'm using the Dracula theme.
Conclusion
To be honest it was a lot of fun getting this to work, do some research and write it up in a post. Maybe I will write about other cool tools in the neovim ecosystem like https://www.youtube.com/watch?v=2WPC8rZQvQU ↩ https://www.youtube.com/watch?v=0fOIp5PH648 ↩ https://github.com/neovim/neovim/pull/14661 ↩ https://www.youtube.com/watch?v=_DnmphIwnjo ↩ https://www.youtube.com/watch?v=Dn800rlPIho ↩ https://www.youtube.com/watch?v=c17j09vY5sw ↩ https://github.com/nvim-treesitter/nvim-treesitter ↩telescope or all the magic you can do with luasnip. But for now I'm very happy with the setup and the speed you get, especially compared to vscode. As a fan of keyboard driven workflows this is more or less the best you can get, and I really enjoy it!